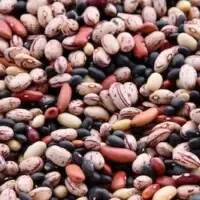
I’ve always loved cooking with beans. They’re versatile, nutritious, and delicious. But sometimes, I find myself with more beans than I can use before they start to go bad. That’s where preserving techniques come in handy.
In this article, I’ll be discussing two of the most common methods for preserving beans: canning and freezing.
Preserving beans has many benefits beyond just preventing waste. It allows you to enjoy your favorite beans all year round, even when they’re out of season or not readily available in your area. Plus, preserved beans are a convenient pantry staple that can be quickly added to soups, stews, salads, and other dishes without having to worry about soaking and cooking them from scratch every time.
Whether you’re an avid bean lover or just looking for ways to reduce food waste and save money on groceries, learning how to preserve beans is a worthwhile skill to have in your culinary arsenal.
Table of Contents
Benefits of Preserving Beans
You’ll love the advantages of keeping your beans fresh and ready to use for any recipe. Not only do preserved beans save time, but they offer several health benefits too.
Canning and freezing techniques can help retain the nutritional value of beans, which are a great source of fiber, protein, and minerals like iron and potassium. Preserving beans is also an excellent sustainability practice as it ensures that you always have a supply of local produce on hand.
By preserving your own beans, you can avoid buying canned goods that often come with added preservatives or chemicals. Additionally, you can reduce food waste by using up excess produce before it spoils. Preserving beans is an easy and cost-effective way to ensure that you always have access to nutritious ingredients while minimizing your environmental impact.
Understanding Canning and Freezing
I want to talk about preserving beans through canning and freezing methods. First, I’ll explain how canning works. It uses heat and pressure to kill bacteria and seal the jars.
Next, I’ll discuss how freezing works. It quickly cools the beans to prevent bacterial growth while maintaining their texture.
Lastly, I’ll weigh the pros and cons of each method so you can decide which one is best for your needs.
How Canning Works
By using this method, you’ll be able to enjoy the taste of summer all year round. Canning is a popular preservation technique that allows you to store food in sealed jars for extended periods. This process involves heating the food at high temperatures to kill bacteria and other microorganisms that can cause spoilage.
Here’s how it works:
- First, prepare the produce by washing and cutting it into appropriate sizes.
- Next, place the produce in sterilized glass jars and add any desired seasonings or liquids.
- Then, seal the jars with lids that’ve been boiled or heated to prevent contamination.
- Process the jars in a pressure canner or boiling water bath according to your recipe’s instructions.
- Finally, let the jars cool before checking their seals and storing them in a cool, dry place.
Canning has many benefits, including reducing waste and allowing you to enjoy fresh produce year-round. However, it’s important to follow proper canning safety procedures and use reliable recipes from trusted sources. By doing so, you’ll be able to preserve your favorite fruits and vegetables safely and effectively.
In conclusion, canning is an excellent way to preserve fresh produce for long-term storage. It requires some effort upfront but pays off with delicious meals throughout the year. If you’re interested in trying this technique yourself, start by reviewing different types of canning methods and investing in quality equipment like a pressure canner or boiling water bath. With practice and attention to safety guidelines, you’ll soon become a pro at preserving beans using this method!
How Freezing Works
Get ready to store your favorite produce in a new, icy way that’ll keep them fresh and delicious for months to come. Freezing is a great method of preserving fruits and vegetables because it slows down the natural process of decay, thereby extending their shelf life.
It works by converting water into ice crystals, which slows down chemical reactions that cause spoilage. The freezing process starts as soon as you place your produce in the freezer. The faster the freezing occurs, the better the quality of the final product.
Therefore, it’s recommended to freeze produce while they’re still fresh – ideally within hours after harvest or purchase. To preserve quality during freezing, take care not to over-pack your containers because this can prevent efficient heat transfer from occurring. Additionally, be sure to label and date all items before storing them in the freezer so that you know when they were frozen and what’s inside each container.
Pros and Cons of Each Method
Discovering the pros and cons of each method is important to find the best way for you to keep your beans fresh in long term storage.
Canning is a great option for those who prefer shelf-stable products that can last up to two years without refrigeration. It also retains most of the nutritional value of the beans during the preservation process. However, canning requires special equipment and knowledge of safe food handling practices to prevent botulism, which can be fatal if ingested.
On the other hand, freezing is an easy and convenient option for preserving beans without any need for special equipment or skills. It also preserves more of the flavor and texture compared to canning. However, freezing may affect some aspects of nutritional value due to enzyme activity during thawing, resulting in slightly lower nutrient content compared to fresh beans. Additionally, frozen foods require freezer space and electricity consumption which could add up over time in terms of cost.
Ultimately, it’s important to weigh these factors when deciding which preservation method works best with your lifestyle and preferences.
Step-by-Step Guide to Canning Beans
Are you ready to start preserving your beloved legumes with a step-by-step guide that will make canning a breeze? First, let’s gather the necessary supplies. You’ll need glass mason jars with lids and bands, a pressure canner or boiling water bath canner, a jar lifter, and a funnel.
As for beans, you can use any type – black beans, kidney beans, navy beans – the choice is yours! Next, it’s time to prepare your beans. Rinse them well and soak them overnight in cold water. Drain and rinse again before cooking them until tender.
Once cooked, fill each jar with the desired amount of beans using the funnel to avoid making a mess. Add salt to taste if desired. Then fill each jar with hot water leaving about 1 inch of headspace at the top. Place lids on jars and tighten bands fingertip-tight before placing them in your pressure or boiling water bath canner according to manufacturer’s instructions.
Process for recommended time depending on altitude and type of bean used before removing from heat source and allowing jars to cool completely before storing in a cool dry place for up to one year. Canning may seem intimidating at first but following these simple steps will have you enjoying delicious preserved beans all year long!
Just remember to always follow proper safety guidelines when it comes to preserving food.
Step-by-Step Guide to Freezing Beans
If you want to enjoy fresh beans even when they’re not in season, freezing them is a great way to preserve their flavor and nutritional value.
The first step in freezing beans is blanching them, which helps retain their color, texture, and taste. To do this, simply place the beans in boiling water for 2-3 minutes until they turn bright green. Then transfer them immediately into an ice bath to stop the cooking process.
Once the beans are blanched and chilled, it’s time to prepare them for the freezer. One tip for optimizing freezer space is to spread out the beans on a baking sheet lined with parchment paper or wax paper and freeze them until they’re firm. This prevents clumping and makes it easier to portion out smaller amounts as needed.
Once frozen solid, transfer them into airtight containers or freezer bags labeled with the date of freezing. When you’re ready to use them, simply thaw the amount you need overnight in the fridge or by running cold water over them in a colander before cooking as desired.
Tips for Using Preserved Beans
Now that you’ve got a stash of beans ready to go, why not try incorporating them into your favorite soups, stews, and salads for an easy protein boost? Preserved beans are versatile and can be used in a variety of creative recipes. Here are some tips to help you make the most out of your preserved beans:
- Use frozen beans in stir-fry dishes or casseroles as they hold their shape better than canned ones.
- Add canned or frozen beans to pasta sauces or meatloaf mixtures for added texture and flavor.
- Mash cooked beans with garlic, olive oil, and lemon juice for a quick dip or spread.
In addition to these recipe ideas, it’s important to note that proper storage solutions can prolong the shelf life of your preserved beans. Store canned beans in a cool, dry place away from direct sunlight. Frozen beans should be kept in an air-tight container or freezer bag and labeled with the date so you can keep track of when they were frozen.
By following these tips, you can enjoy the convenience and nutritional benefits of preserved beans all year round!
Conclusion
In conclusion, preserving beans through canning and freezing techniques is a great way to ensure your pantry is stocked with nutritious and delicious ingredients all year round. It’s like having a treasure trove of jewels that you can easily access whenever you need them.
Whether you prefer canned or frozen beans, both methods are effective in preserving the quality and flavor of this versatile legume. With proper preparation and storage, you can enjoy the benefits of preserved beans for months to come.
Don’t be afraid to experiment with different recipes and cooking methods using your preserved beans – they’re a valuable addition to any meal! Remember to always follow safety guidelines when canning or freezing foods at home, but don’t let that discourage you from trying out these preservation methods.
Happy preserving!

